
In this article we will deploy our spring boot micro service into docker. In our previous article we had created a simple "Hello World" spring boot micro service. Now, we will deploy that application into Docker. Check how to create a spring boot micro service.
Docker with spring boot is the current popular technology stack which enables organization to seamlessly develop and make production ready artifacts. If you want to learn more about docker, read more here.
Before deploying the application into docker, make sure you have installed the docker. In this example we have used Docker Community Edition ( Docker CE) on windows OS. How to install docker on Windows/MacOS/Linux. We can also use Alpine Linux image , it provide minimal Linux environment to deploy & run the application.There are few docker commands to manage your application. Below sample command and screen shot shows to check the version of your installed docker engine.
Command -
docker --version

What we need to deploy a spring boot application in Docker?


Now, our image file is ready. We can push this image to docker container using below command .
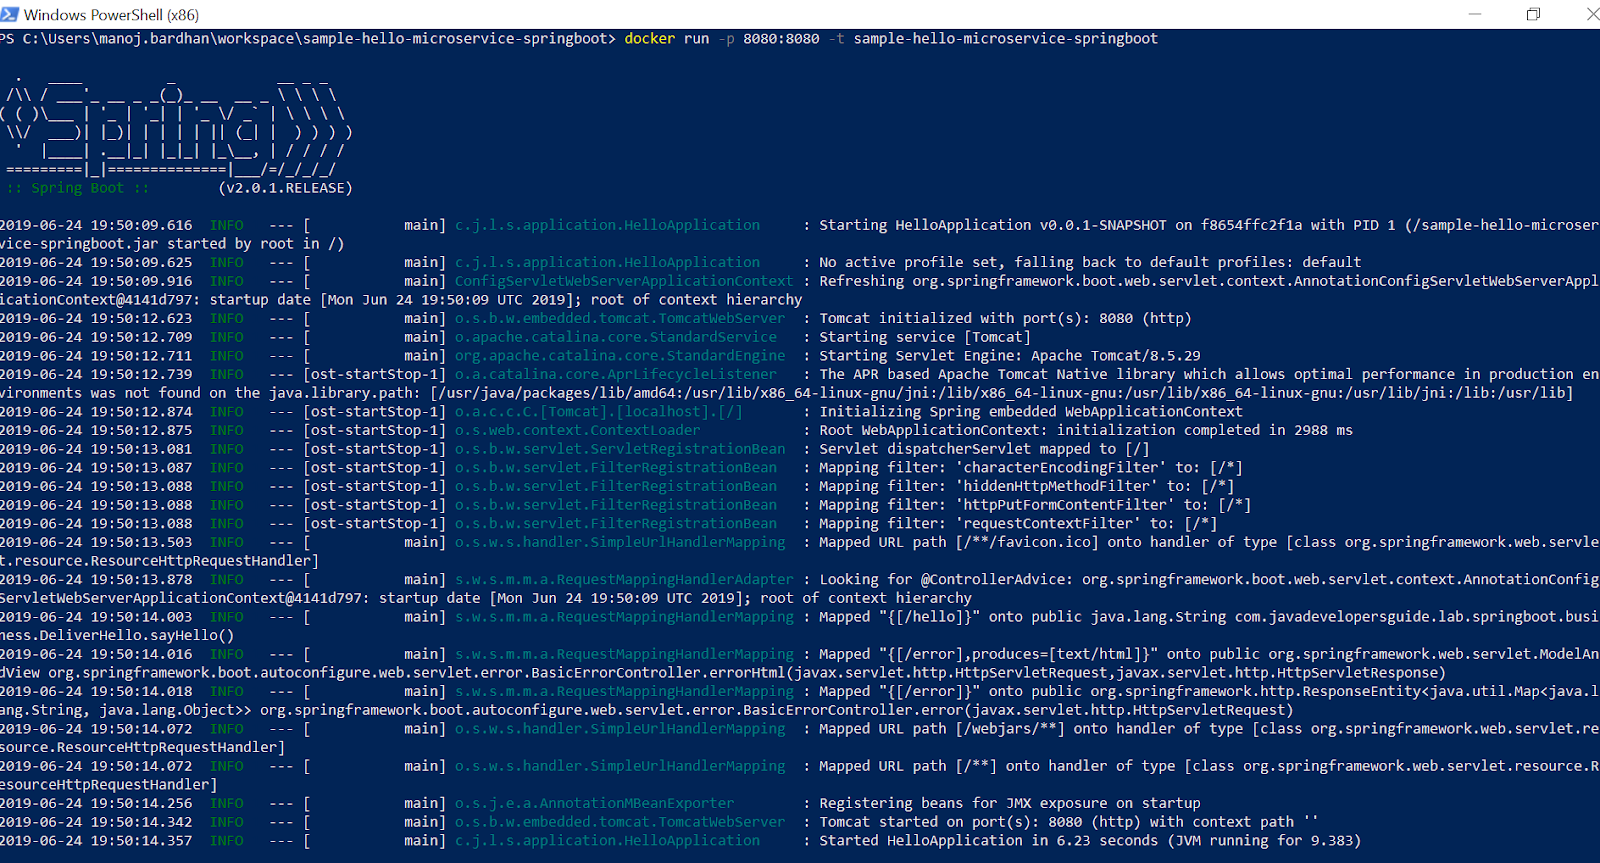
Syntax - docker run -p <exposed port> -t <image file name>
docker run -p 8080:8080 -t sample-hello-microservice-springboot

Now our micro service has been deployed to docker and its exposed on port 8080 as per our configuration in the docker file. We can check the running container and its status.

Now we can also accessed from browser as below.
 There are few useful docker command as below .
docker system prune
This will remove: - all stopped containers
- all networks not used by at least one container
- all dangling images
- all dangling build cache
docker ps -a
This will show all process in docker engine.
docker images
This will show all the images you created.
docker stop <container id>
This will stop the container.
If required , there are help options to get the help about each command. Read more.
docker ps --help
docker run --help
Docker with spring boot is the current popular technology stack which enables organization to seamlessly develop and make production ready artifacts. If you want to learn more about docker, read more here.
Before deploying the application into docker, make sure you have installed the docker. In this example we have used Docker Community Edition ( Docker CE) on windows OS. How to install docker on Windows/MacOS/Linux. We can also use Alpine Linux image , it provide minimal Linux environment to deploy & run the application.There are few docker commands to manage your application. Below sample command and screen shot shows to check the version of your installed docker engine.
Command -
docker --version

What we need to deploy a spring boot application in Docker?
- First, we need to create an Image file for our application. Docker image is a most important component for docker engine. Docker provides a docker hub, its an library and community for container images. We can use docker hub to get the most common images . In the below project structure , we have created a "Dockerfile.txt". If you put this docker file into the class path, then docker engine will automatically identify and load this file. This docker file name is very sensitive, so you must follow the naming convention as mentioned in the below screen shot. Docker reads commands/instructions from "Dockerfile.txt" and build the image.

The below docker file contains the commands to create the image. Actually there are many commands used for different purpose. Here we have used few commands as per our needs.
- FROM - Must be the first non-comment instruction in the Dockerfile. This command creates layer from the docker image. In our case we have used java:8, It means this application will run on java 8.
- EXPOSE - Exposing port for the endpoint. In this example we have configure 8080.
- ADD - This command helps to takes a source and destination. Normally source is your local copy. COPY command also does same thing , but there is small difference between COPY & ADD command.
- ENTRYPOINT - Its similar to CMD, where our command/jar file will be executed.
- There are many other commands for creating docker image. Read more about docker command.
- Now , run the command to build the image and deploy into docker. Before running the docker command we need to create the .jar file. Because, we are creating a jar file and then creating the jar file as docker image. So, here we have used mvn clean install command to create the jar file.
Creating a jar file. Below maven command is used to create the jar file.
clean install

Now , we can see below the .jar file has been created.
clean install

Now , we can see below the .jar file has been created.

Create a docker image file. Below command is used to create the image file.
Syntax - docker build -t <image file name> <destination directory>
docker build -t sample-hello-microservice-springboot .

As per the above screenshot, it seems we have created the docker image successfully. You can check the created image by using command "docker images".
docker images
Now, our image file is ready. We can push this image to docker container using below command .
Syntax - docker run -p <exposed port> -t <image file name>
docker run -p 8080:8080 -t sample-hello-microservice-springboot
Now our micro service has been deployed to docker and its exposed on port 8080 as per our configuration in the docker file. We can check the running container and its status.
Now we can also accessed from browser as below.

docker system prune
This will remove: - all stopped containers
- all networks not used by at least one container
- all dangling images
- all dangling build cache
docker ps -a
This will show all process in docker engine.
docker images
This will show all the images you created.
docker stop <container id>
This will stop the container.
If required , there are help options to get the help about each command. Read more.
docker ps --help
docker run --help
Hope it will help you.
Follow for more details on @Facebook!!!
Find More :-
Find More :-
- Write your first groovy program.
- Top 10 groovy interview question.
- Difference between groovy and java.
- What is full stack development experience.
- 5 fundamental questions of groovy.
- Write your first java program.
- Reverse string using recursive method in java.
- How to Handle NullPointerException using JDK 8
- Spring Boot Hello World Program- A Step-By-Step Guide
I have read this post. collection of post is a nice one..!!
ReplyDeleteDocker Training
Docker Online Training
ReplyDeleteThis post is much helpful for us. This is really very massive value to all the readers and it will be the only reason for the post to get popular with great authority.
DevOps Training in Chennai | DevOps Training in anna nagar | DevOps Training in omr | DevOps Training in porur | DevOps Training in tambaram | DevOps Training in velachery
Great Blog!
ReplyDeleteVisit spring boot certification course!
Very interesting to read this article.
ReplyDeletespring boot online training
spring boot certification course
spring boot online course
Abinitio online training
ReplyDeleteAbinitio training
NICE..........!
ReplyDeletespring boot certification course training
The blog is a valuable resource for anyone looking to deploy a Spring Boot microservice into Docker.
ReplyDeleteAlso Read: Java Message Queues (MQ): Unlocking Efficient Data Communication