20 November, 2016

How to set java version in Linux

How to set java version in Linux or Unix.


Here I have used Linux Mint, but this setup can work for other Linux distributions. 

Checking the existing java version on your linux machine.
dev@developer-desktop ~ $ java -version
java version "1.6.0_36"
OpenJDK Runtime Environment (IcedTea6 1.13.8) (6b36-1.13.8-0ubuntu1~12.04)
OpenJDK 64-Bit Server VM (build 23.25-b01, mixed mode)


The above command shows the existing java version installed on this machine. Now I can check the alternative version to set. These alternative versions are available for installation. The below command will prompt with sudo password and selection number. Try with below command :


dev@developer-desktop ~ $ sudo update-alternatives --config java
[sudo] password for dev: ***********
There are 3 choices for the alternative java (providing /usr/bin/java).

  Selection    Path                                            Priority   Status
------------------------------------------------------------
* 0            /usr/lib/jvm/java-6-openjdk-amd64/jre/bin/java   1061      auto mode
  1            /usr/bin/gij-4.6                                 1046      manual mode
  2            /usr/lib/jvm/java-6-openjdk-amd64/jre/bin/java   1061      manual mode
  3            /usr/lib/jvm/java-7-openjdk-amd64/jre/bin/java   1051      manual mode

Press enter to keep the current choice[*], or type selection number: 3
update-alternatives: using /usr/lib/jvm/java-7-openjdk-amd64/jre/bin/java to provide /usr/bin/java (java) in manual mode.

In the above command, I have opted the Selection 3 , because I want java 1.7 version. You can choose as per your requirements. 


Now you can check whether version 7 is installed or not ? Try the check version command again as below.

dev@developer-desktop ~ $ java -version
java version "1.7.0_79" -----> This is newly installed.
OpenJDK Runtime Environment (IcedTea 2.5.6) (7u79-2.5.6-0ubuntu1.12.04.1)
OpenJDK 64-Bit Server VM (build 24.79-b02, mixed mode)


Hope this will help you.


Follow for more details on Google+ and @Facebook!!!

Find More :-


10 November, 2016

How to convert String date to Java Calendar

How to convert String date to Java Calendar.


This can be done by some other way also, but  I have done in the below format. Hope this is will help you.
Example :- 
Input String Date - "20160829T23:59:59Z"

import java.text.SimpleDateFormat;
import java.util.Calendar;
import java.util.Date;

public class StringDateToCalendar {

    /**
     * @param args
     */
    public static void main(String[] args) throws Exception {
            String string = "20160829T23:59:59Z";
            String pattern = "yyyyMMdd'T'HH:mm:ss'Z'";
            Date date = new SimpleDateFormat(pattern).parse(string);
            Calendar calendar = Calendar.getInstance();
            calendar.setTime(date);
            System.out.println("Calendar is :: "+ calendar.getTime());
    }

}
Output :-
Calendar is :: Mon Aug 29 23:59:59 AEST 2016


Follow for more details on Google+ and @Facebook!!!

Find More :-

How to convert String date to Java Date format

How to convert String date to Java Date format.


This can be done by some other way also, but  I have done in the below format. Hope this is will help you.

Example :- 

Input String Date - "20160829T23:59:59Z"


import java.text.SimpleDateFormat;
import java.util.Date;

public class StringDateToCalender {
    public static void main(String[] args) throws Exception {
        String string = "20160829T23:59:59Z";
        String pattern = "yyyyMMdd'T'HH:mm:ss'Z'";
        Date date = new SimpleDateFormat(pattern).parse(string);
        System.out.println(date);
    }
}

Output :-
Converted Date is :: Mon Aug 29 23:59:59 AEST 2016


09 October, 2016

java.lang.Error: Unresolved compilation problems

java.lang.Error: Unresolved compilation problems:


Facing issue is often hurdle for developer :) :) As you all know, Java Developers Guide always posted the realtime issues. This issue I have faced while writing Junit test cases, but its not so easy to fix your development desktop. The below issue normally happens when the class path is missed the related weblogic jar.

I am using weblogic for jaxrpc client calls, and its failing to find the weblogic jar. Below error logs :
  

java.lang.Error: Unresolved compilation problems:
    The type weblogic.wsee.jaxrpc.ServiceImpl cannot be resolved. It is indirectly referenced from required .class files
    The type weblogic.wsee.jaxrpc.StubImpl cannot be resolved. It is indirectly referenced from required .class files
    The import weblogic.wsee.security cannot be resolved
    The import weblogic.xml cannot be resolved
    The import weblogic.xml cannot be resolved
    The method addCredentialsToSecurityHeader(Stub, HandlerInfo) in the type JdcNotificationHandler is not applicable for the arguments (JdcEnablerService_PortType_Stub, HandlerInfo)
    The method addCredentialsToSecurityHeader(Stub, HandlerInfo) in the type JdcNotificationHandler is not applicable for the arguments (JdcEnablerService_PortType_Stub, HandlerInfo)
    The method addCredentialsToSecurityHeader(Stub, HandlerInfo) in the type JdcNotificationHandler is not applicable for the arguments (JdcEnablerService_PortType_Stub, HandlerInfo)
    CredentialProvider cannot be resolved to a type
    CredentialProvider cannot be resolved to a type
    CredentialProvider cannot be resolved to a type
    ClientUNTCredentialProvider cannot be resolved to a type
    WSSecurityContext cannot be resolved to a variable

    at au.com.mycompany.mcas.sdp.bizservice.user.domain.util.notification.JdcNotificationHandler.<init>(JdcNotificationHandler.java:1)
    at au.com.mycompany.mcas.sdp.bizservice.user.application.facade.spring.handler.JdcNotificationHandlerTest.<init>(JdcNotificationHandlerTest.java:31)
    at sun.reflect.NativeConstructorAccessorImpl.newInstance0(Native Method)
    at sun.reflect.NativeConstructorAccessorImpl.newInstance(NativeConstructorAccessorImpl.java:62)
    at sun.reflect.DelegatingConstructorAccessorImpl.newInstance(DelegatingConstructorAccessorImpl.java:45)
    at java.lang.reflect.Constructor.newInstance(Constructor.java:423)
    at org.junit.internal.runners.JUnit4ClassRunner.createTest(JUnit4ClassRunner.java:72)
    at org.mockito.internal.runners.JUnit44RunnerImpl$1.createTest(JUnit44RunnerImpl.java:26)
    at org.junit.internal.runners.JUnit4ClassRunner.invokeTestMethod(JUnit4ClassRunner.java:79)
    at org.junit.internal.runners.JUnit4ClassRunner.runMethods(JUnit4ClassRunner.java:51)
    at org.junit.internal.runners.JUnit4ClassRunner$1.run(JUnit4ClassRunner.java:44)
    at org.junit.internal.runners.ClassRoadie.runUnprotected(ClassRoadie.java:27)
    at org.junit.internal.runners.ClassRoadie.runProtected(ClassRoadie.java:37)
    at org.junit.internal.runners.JUnit4ClassRunner.run(JUnit4ClassRunner.java:42)
    at org.mockito.internal.runners.JUnit44RunnerImpl.run(JUnit44RunnerImpl.java:37)
    at org.mockito.runners.MockitoJUnitRunner.run(MockitoJUnitRunner.java:62)
    at org.eclipse.jdt.internal.junit4.runner.JUnit4TestReference.run(JUnit4TestReference.java:50)
    at org.eclipse.jdt.internal.junit.runner.TestExecution.run(TestExecution.java:38)
    at org.eclipse.jdt.internal.junit.runner.RemoteTestRunner.runTests(RemoteTestRunner.java:467)
    at org.eclipse.jdt.internal.junit.runner.RemoteTestRunner.runTests(RemoteTestRunner.java:683)
    at org.eclipse.jdt.internal.junit.runner.RemoteTestRunner.run(RemoteTestRunner.java:390)
    at org.eclipse.jdt.internal.junit.runner.RemoteTestRunner.main(RemoteTestRunner.java:197)


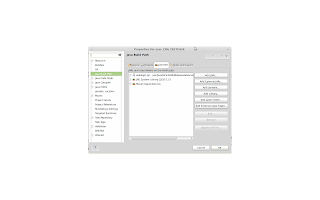
How to fix  :- This is very simple, just add the weblogic.jar library jar into your class path. Steps as below,


Right Click on Project => Build Path => Libraries and then add the required jar (In my case I have added weblogic.jar).

The screenshot attached for reference. 


java.lang.Error


Hope it will help you.


Follow for more details on Google+ and @Facebook!!!

Find More Issues & Solutions -


13 September, 2016

How to configure the username on git

How to configure the user name on git.


This is simple solution but BIG question .....???

To change/configure the user name at your local machine is very easy, but the user name issue is often trouble to developer.

Usually you will get the below error :-

remote: refs/heads/bugfix/testtagging: bd04a65ec413cecbd11cadc336cb4dd25fa3d935: expected committer name 'Manoj Kumar Bardhan' but found 'manojkumar.bardhan'

To fix this , you need to configure the user name as expected. First check what is the existing user name before set to new.

dev@jdg-developer-desktop ~/testtagging/test $ git config --global user.name
manojkumar.bardhan


Change/Configure the user name by using below command, you can provide your expected user name.


dev@jdg-developer-desktop ~/testtagging/test $ git config --global user.name "Manoj Kumar Bardhan"

Now, you can check again the user name after change/configure.

dev@jdg-developer-desktop ~/testtagging/test $ git config --global user.name
Manoj Kumar Bardhan


Now you can see the old user name was "manojkumar.bardhan" and new user name is "Manoj Kumar Bardhan".


It worked for me, hope it will help you.


Follow for more details on Google+ and @Facebook!!!

Find More :-

How to create tag on github

How to create tagging on git.


Really creating tag is  one of the best practice for development and maintain version. 


As per my understanding production release for your code is a nightmare , we don't know what will happen ???????

Also to maintain the code base stable and safety we need this tagging. This is quite often developers do goooooogle for tagging the their code (branch / master) for safety and reference future use.

This is quite simple , and below example will help you to understand the commands on command line.

Clone your code branch (use clone command to clone the code)

git clone https://your.user.name@stash.jdgnet.com.au/scm/enabler/testcode.git

Switch your expected branch (i.e.  bugfix/jdctagging) , which you want to create tagging and make sure you are inside the expected branch.

dev@jdg-developer-desktop ~/jdgtaggingdemo/test $ git checkout bugfix/jdctagging
Branch bugfix/testing set up to track remote branch bugfix/jdctagging from origin.
Switched to a new branch 'bugfix/jdctagging'
dev@jdg-developer-desktop ~/jdgtaggingdemo/test $ git branch
* bugfix/jdctagging
  master


Create the tag with below command, you can specify the tag version name.

dev@jdg-developer-desktop ~/jdgtaggingdemo/test $ git tag -a "v1.taging.version1" -m "commiting with for test tagging for my branch code"

Check the tag got created on above command.

dev@jdg-developer-desktop ~/jdgtaggingdemo/test $ git tag
v1.taging.version1

Push the newly created tag into remote server (stash)

dev@jdg-developer-desktop ~/jdgtaggingdemo/test $ git push origin v1.taging.version1
Password for 'https://your.user.name@stash.jdgnet.com.au':
To https://your.user.name@stash.jdgnet.com.au/scm/enabler/test.git
 * [new tag]         v1.taging.version1 -> v1.taging.version1

If you don't want to push the tag by name and you want to push all tags then use below command. In my example I have only created one tag and I didn't use the below command.


git push origin --tags


Now you can see the [new tag] got created on remote server. See the snapshot below , showing the tag on stash.


Hope it will help you.


Follow for more details on Google+ and @Facebook!!!

Find More :-

15 August, 2016

How to mock private fields of a class for JUnit testing

How to mock private fields of a class for JUnit testing ?


This is really very tricky and major concern for developers. Specially who are not following TDD(Test Driven Developement ) process.

Of course it not the challenge for java developer to get this done, but when there is a time period to deliver your project. ohh god !!! you only can save me.


By the way , I also faced same issue with my recent project. After some kind of investigation .. and its weird. 


Actully I was using Junit with Mockito. I tried with mockito , but no luck. Hence mockito will not allow you to set the private fields . 

Finally I tried with Reflection to enforce the private variable to set the data using ReflectionTestUtils.
import org.springframework.test.util.ReflectionTestUtils;
 

Sample code fix using Junit Test (Reflection API) :-

/**
 * This class contains your private variables those you want to mock.
 */

public class MyObjectImplImpl {
    private String fieldName1;
    private String fieldName2;

}

Test Class (MyObjectImplTest.java):-

public class MyObjectImplTest {

    @InjectMocks
    MyObjectImplImpl myObjectImplImpl;

    @Before
    public void before() {
        myObjectImplImpl = mock(MyObjectImplImpl.class);
        myObjectImplImpl = new MyObjectImplImpl();

        //Set the private variable values here by reflection.
        ReflectionTestUtils.setField(myObjectImplImpl, "fieldName1", "setnew-field-value-1");
        ReflectionTestUtils.setField(myObjectImplImpl, "fieldName2", "setnew-field-value-2");
    }


    /**
     * Your Test Method.
     */
    @Test
    public void testJavaDeveloperGuide() {
       //do your test case here.
    }

}


This is working fine for me.


Either the alternative is you can try powermock , instead of mockito. Powermock is working for this issue. This will fix this private field access issue. Also its more powerful than mockito.


Happy coding.........!!!


Hope this will help you and will save your all day :::)


30 June, 2016

How to test web service using command line curl

How to test web service using command line curl.


How to test web service using command line curl, is a very often requirement.

This is always very easy to call the web service via a java client,  but sometimes we need to call the service using curl.

One thing you know ? its really very tactical to  call the web service from terminal/command line using curl command.


I have  steps with sample example :-


You need to know the below things before calling the service via curl.

Service Endpoint - The web service endpoint you want to call.

Example - http://myserverip.mycorpnet.com.au:16500/NaaSAutomation/NaaSManageService

Operation Name - The operation name , you want to execute.

Example - readProviderRequest

SoapAction - The soap action defined in WSDL.

Example - SOAPAction:/NaaSAutomation/Resources/WSDLs/ESB/Service/NaaSManageService-service0.serviceagent/NaaSManageServicePortEndpoint0/ManageProviderRead

Create sample valid request xml for sending to the service.

Request.xml
------------------

<soapenv:Envelope xmlns:soapenv="http://schemas.xmlsoap.org/soap/envelope/" xmlns:dto="http://dto.service.myservice.networkservice.test.service.mycorp.com.au/">
   <soapenv:Header/>
   <soapenv:Body>
      <dto:readProviderRequest>
         <callerIdentity>myIdentity</callerIdentity>
         <dto:ProviderName>JDevelopersGuide</dto:ProviderName>
      </dto:readProviderRequest>
   </soapenv:Body>
</soapenv:Envelope>


Curl Command :-

curl --header "Content-Type: text/xml;charset=UTF-8" --header "SOAPAction:/NaaSAutomation/Resources/WSDLs/ESB/Service/NaaSManageService-service0.serviceagent/NaaSManageServicePortEndpoint0/ManageProviderRead" --data @Request.xml http://myserverip.mycorpnet.com.au:16500/NaaSAutomation/NaaSManageService


Response got from Curl :-


<SOAP-ENV:Envelope xmlns:SOAP-ENV="http://schemas.xmlsoap.org/soap/envelope/">
   <SOAP-ENV:Body>
      <ns0:ManageProviderCreateRes xmlns:ns0="http://www.mycorpnet.com.au/NaaSAutomation/Resources/Schemas/CreateRequest.xsd">
         <ns0:response>
            <ns0:providerName>JDevelopersGuide</ns0:providerName>
            <ns0:createStatus>SUCCESS</ns0:createStatus>
            <ns0:rollbackInitiated>TRUE</ns0:rollbackInitiated>
         </ns0:response>
      </ns0:ManageProviderCreateRes>
   </SOAP-ENV:Body>
</SOAP-ENV:Envelope>


Hope it will help you.
Follow for more details on Google+ and @Facebook!!!

Find More :-